Bài 4: ReactJS - Components & State
Trong bài này, ta sẽ tìm hiểu cách kết hợp các components để làm cho ứng dụng dễ bảo trì hơn. Cách tiếp cận này cho phép cập nhật và thay đổi các component mà không ảnh hưởng đến phần còn lại của trang.
State biểu diễn trạng thái của component, state là private chỉ có thể thay đổi bên trong bản thân của chính component đó. Chúng ta có thể change states bằng cách gọi this.setState()
Stateless :
Mình sẽ minh họa lớp component trong App.jsx, lớp component này có thể được xem như là nơi chứa của Header và Content. Xem đoạn code dưới đây nhé :
App.jsx
import React from 'react';

class App extends React.Component {
   render() {
      return (
         <div>
            <Header/>
            <Content/>
         </div>
      );
   }
}
class Header extends React.Component {
   render() {
      return (
         <div>
            <h1>Header</h1>
         </div>
      );
   }
}
class Content extends React.Component {
   render() {
      return (
         <div>
            <h2>Content</h2>
            <p>The content text!!!</p>
         </div>
      );
   }
}
export default App;
Để có thể chạy ứng dụng , ta cần phải import file main.js và gọi reactDOM.render()
main.js
import React from 'react';
import ReactDOM from 'react-dom';
import App from './App.jsx';

ReactDOM.render(<App />, document.getElementById('app'));
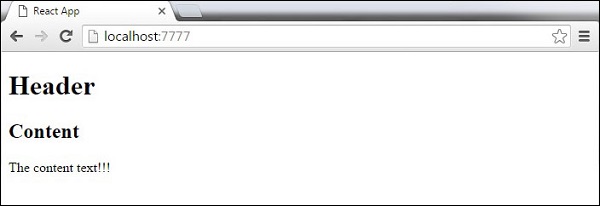
Và đây là kết quả hiển thị:

Stateful
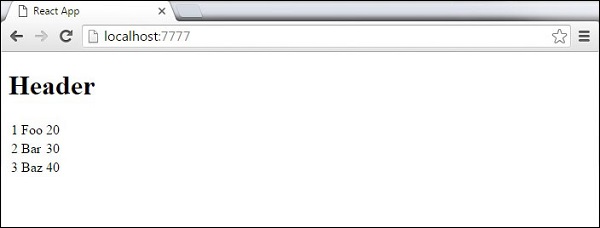
Trong ví dụ minh họa này, mình muốn đặt trạng thái cho lớp cha (App). Component Header chỉ được thêm vào giống như trong ví dụ trước vì nó không cần bất kỳ trạng thái nào. Thay vì thẻ Content, mình tạo các phần tử tablevà tbody, và tự động chèn TableRow cho mọi đối tượng từ mảng dữ liệu.
Lưu ý rằng ở đây mình sử dụng cú pháp arrow syntax (=>) từ bảng EcmaScript 2015, trông code trở nên clean hơn. Điều này giúp ta sẽ tiết kiệm được dòng code , đặc biệt là khi tạo một danh sách với rất nhiều mục
App.jsx
import React from 'react';

class App extends React.Component {
   constructor() {
      super();
      this.state = {
         data:
         [
            {
               "id":1,
               "name":"Foo",
               "age":"20"
            },
            {
               "id":2,
               "name":"Bar",
               "age":"30"
            },
            {
               "id":3,
               "name":"Baz",
               "age":"40"
            }
         ]
      }
   }
   render() {
      return (
         <div>
            <Header/>
            <table>
               <tbody>
                  {this.state.data.map((person, i) => <TableRow key = {i}
                     data = {person} />)}
               </tbody>
            </table>
         </div>
      );
   }
}
class Header extends React.Component {
   render() {
      return (
         <div>
            <h1>Header</h1>
         </div>
      );
   }
}
class TableRow extends React.Component {
   render() {
      return (
         <tr>
            <td>{this.props.data.id}</td>
            <td>{this.props.data.name}</td>
            <td>{this.props.data.age}</td>
         </tr>
      );
   }
}
export default App;
main.js
import React from 'react';
import ReactDOM from 'react-dom';
import App from './App.jsx';

ReactDOM.render(<App/>, document.getElementById('app'));
Lưu ý - ở đây ta đang sử dụng hàm key = {i} bên trong map (). Điều này sẽ giúp React chỉ cập nhật các phần tử cần thiết thay vì hiển thị lại toàn bộ danh sách khi có điều gì đó thay đổi. Đó là một sự tăng hiệu suất rất lớn cho số lượng lớn hơn các phần tử được tạo động.

Ví dụ 1
class App extends React.Component {
  constructor(props) {
    super(props)

    this.state = {
      name: 'your name'
    }
  }

  onChange(e) {
    this.setState({name: e.target.value});
  }

  render() {
    return (
      <div>
        <input type='text' onChange={this.onChange.bind(this)} />
        <Notification title="hello">{this.state.name}</Notification>
      </div>
    );
  }
}- Ở đây chúng ta khởi tạo state với name: 'your name'
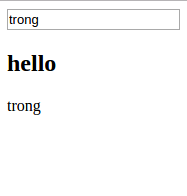
- Hàm onChange được gọi mỗi khi giá trị input thay đổi và nó sẽ setState name bằng giá trị input
- state.name được truyền vào component Notification thông qua props.children
- Mỗi khi state.name thay đổi thì component Notification sẽ được render lại.
Kết quả:

Ví dụ 2
App.jsx
import React from 'react';

class App extends React.Component {
   constructor(props) {
      super(props);

      this.state = {
         header: "Header from state...",
         content: "Content from state..."
      }
   }
   render() {
      return (
         <div>
            <h1>{this.state.header}</h1>
            <h2>{this.state.content}</h2>
         </div>
      );
   }
}
export default App;
main.js
import React from 'react';
import ReactDOM from 'react-dom';
import App from './App.jsx';

ReactDOM.render(<App />, document.getElementById('app'));
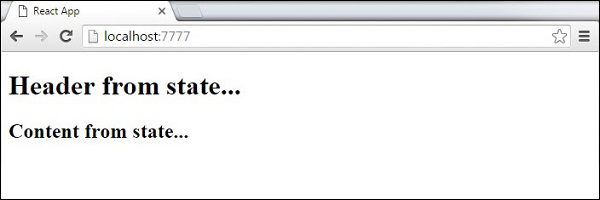
Kết quả hiển thị như sau :


